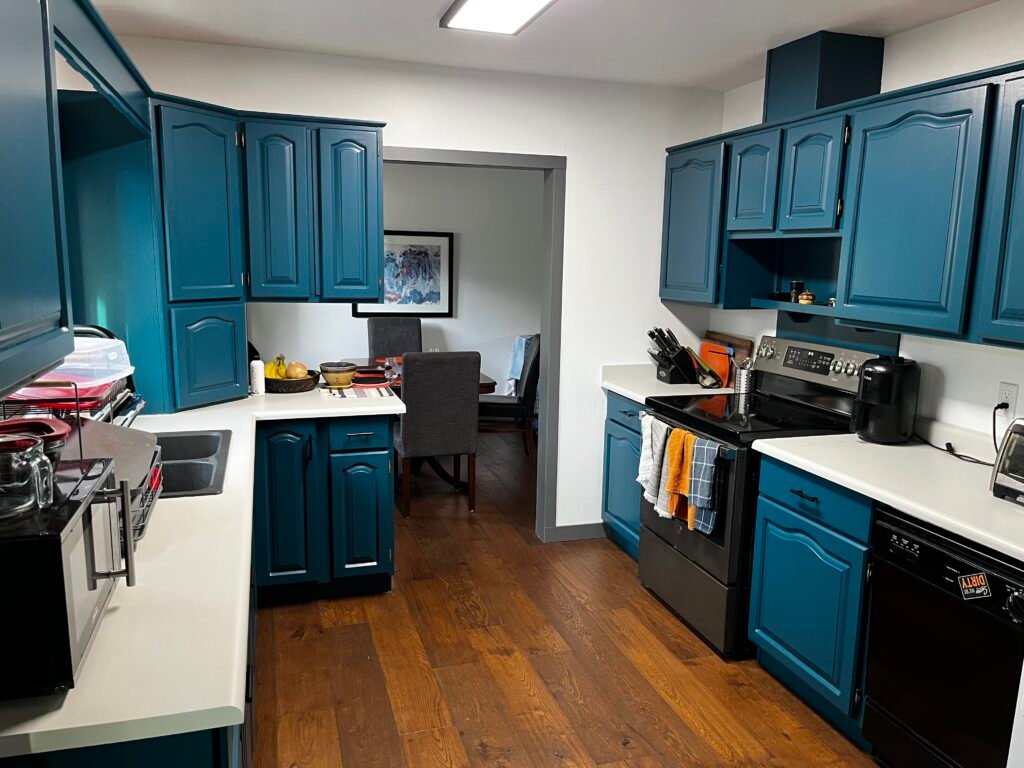
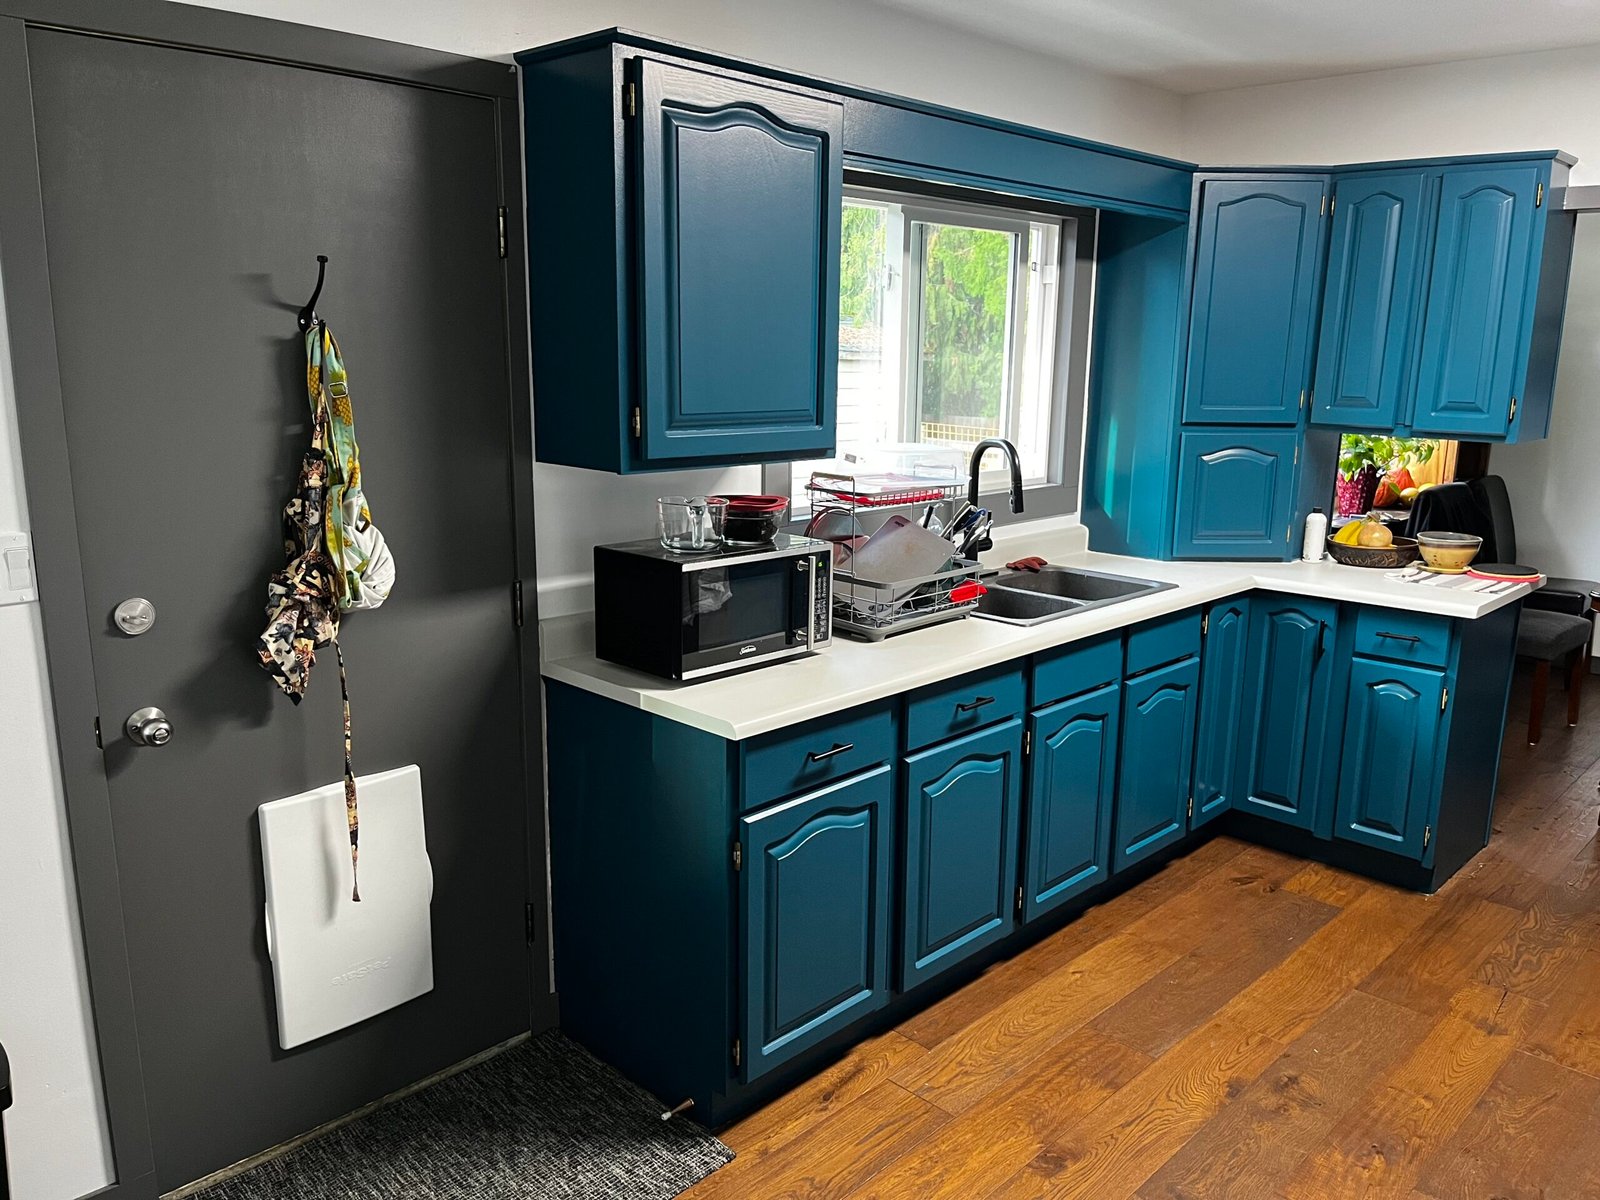
This project was a great one as I had previously installed the engineered hardwood flooring throughout the main floor 8 months earlier but unfortunately the customer didn’t have the budget to finish off the entire kitchen at that time. They were disappointed since they had grown very tired of the old oak cabinetry, the blue walls and the kitchen didn’t match their ideal home but now they did have the budget so they reached out to me and it was time to get to work!
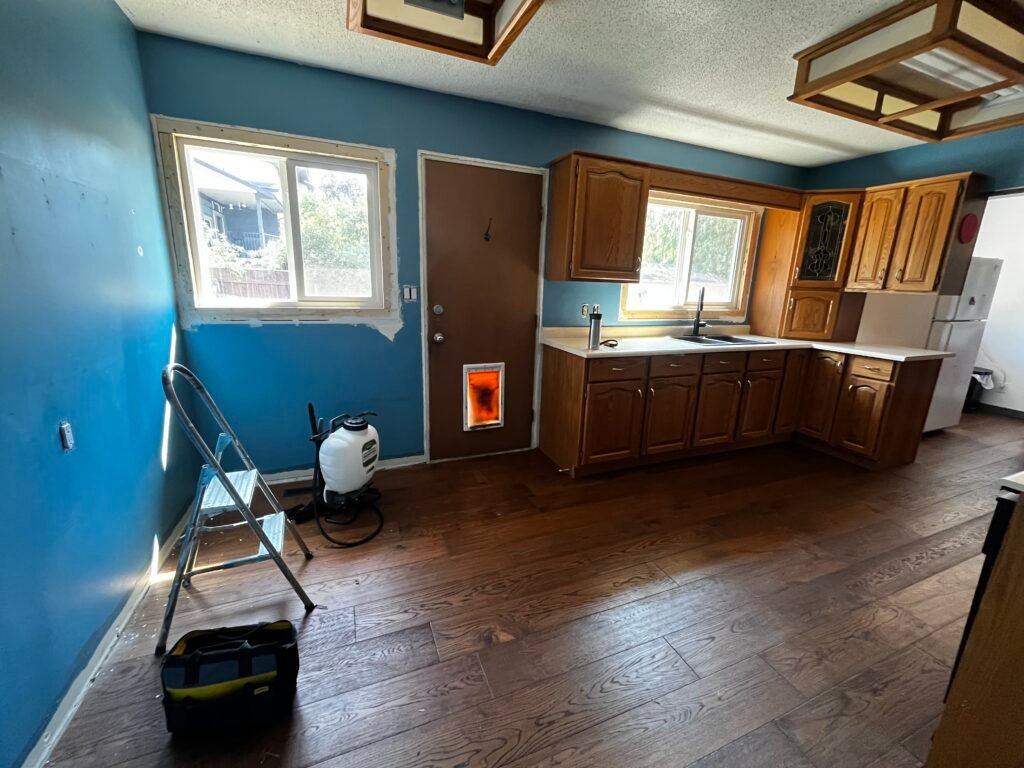
This project had many parts to it and was a full refresh of the kitchen.
For those that want a short breakdown of the work involved in the refresh, it entailed the following: trimming out the interior windows, removing light boxes and fluorescent light fixtures, removing the popcorn ceiling, reapplying a knockdown ceiling texture, repairing small damage to the drywall, painting the walls and ceiling, painting and installing new baseboards and trim, replacing all the electrical outlets, switches and faceplates, installing new LED lighting, installing and repurposing an existing cabinet into a coffee bar, refinishing the countertops with a paint and top coat system, painting all cabinets, replacing all cabinet hardware and fixtures and painting the backdoor.
If you’re interested in how I transformed an outdated 80’s kitchen into a bright and bold modern space keep reading, I explain it in greater detail below.
To begin with, the windows had been replaced at an earlier date but hadn’t been finished on the inside so I needed to trim those out flush with the walls so I could move on with the rest of the refresh. The customers really disliked the old popcorn ceiling, oak light boxes and fluorescent lighting in the kitchen and wanted me to remove them. The light boxes and fixtures were removed as was the popcorn ceiling and I replaced it with a subtle knockdown texture.
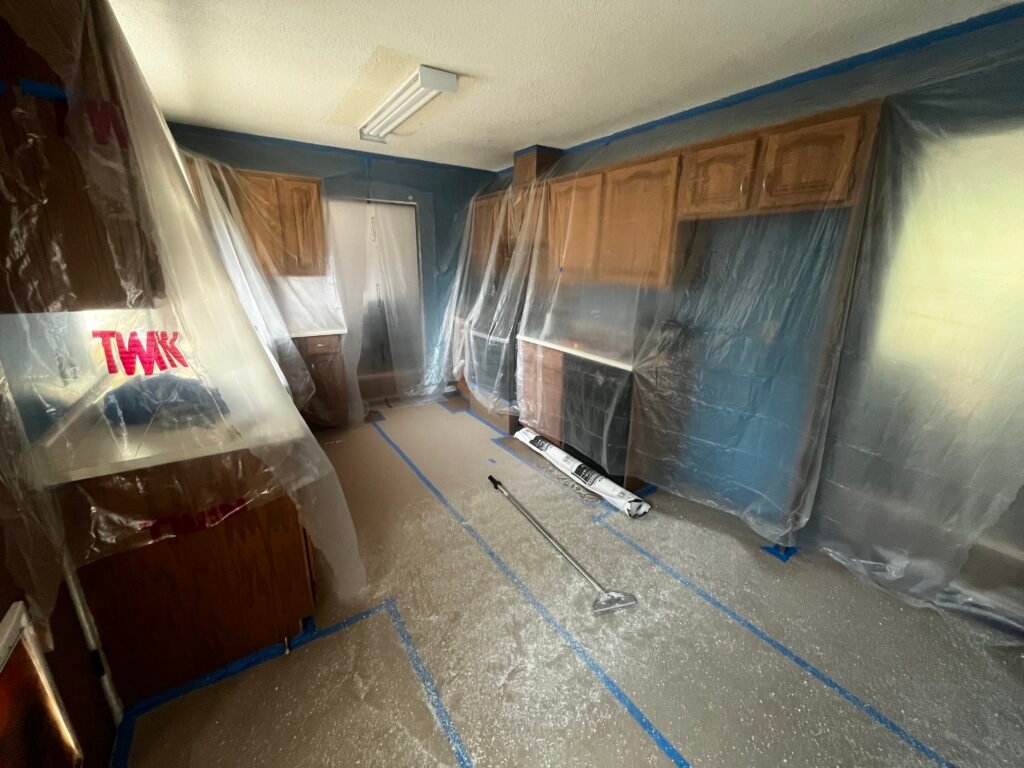
Having repaired any defects in the drywall and taped off everything in the kitchen, I proceed to prime and paint the walls and ceiling. The kitchen looked great after the new paint and the new low profile LED lighting I installed really increased the feeling of height and space within the kitchen itself while brightening the whole room. All the old off white electrical outlets, switches and faceplates were replaced at this time and I painted and installed all new trim and baseboards.
The customer was very happy with how things were proceeding at this point and inquired about creating a coffee bar at the end of the kitchen to better utilize the space and have more storage. After some discussion, we realized that they had an unused cabinet in the basement. I repurposed the cabinet for the coffee bar and that saved them both time and money. It was a great solution all around!
With the newly painted walls, baseboards and trim it became clear that the old countertops weren’t going to compliment the new look we were creating so the customer asked me to look into the cost for new countertops. New countertops are expensive though and didn’t fall within their budget so I offered up a less expensive but also less long term solution, a two-part countertop paint and top-coat. They only last on average 3-5 years but the client was happy with that as it gave them time to save up for the countertops that they wanted for their kitchen. They gave me the green light and so I proceed to refinish the countertops.
With the countertops appearing new, the kitchen looked pretty good at this point even with the remaining oak cabinetry but the customer had a vision of their ideal kitchen space and so it was time to move onto the cabinets!
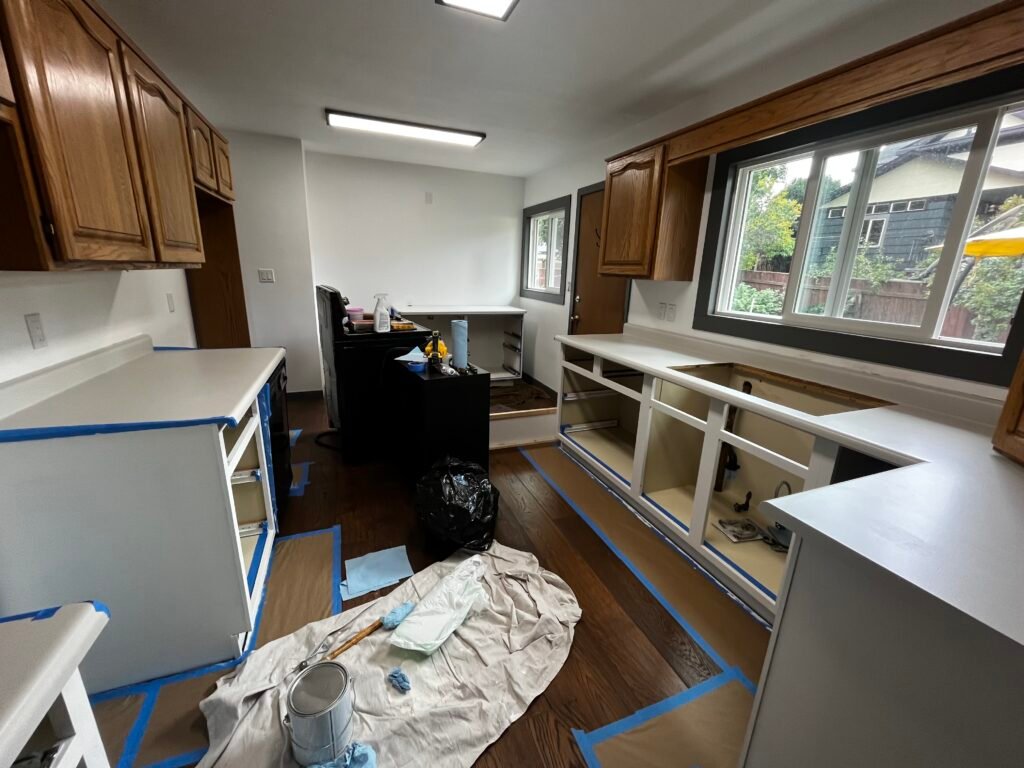
A refresh project isn’t as intrusive as a full renovation but I understand that my customers have lives and have to live in their homes throughout the project so I always try to work with them to find the least intrusive approach. Since having to paint the cabinet boxes often means taking items out of the cabinets we decided to do the all lowers in one pass and then do the uppers in a separate pass so that the kitchen was still useable and they didn’t have kitchen items stacked up all over their house.
To begin, I removed all the lower doors, drawer faces, cabinet hardware and hinges from the cabinet boxes including those of the newly installed coffee bar. I took the doors and drawer faces to my shop to be sprayed and after a good cleaning and sanding taped off the cabinet boxes for rolling primer and paint. Once everything was completed and the lowers were all assembled again I repeated the process with all the upper cabinets.
The customers had originally picked out 3 possible colors for the cabinets and while 2 were safe, they were also somewhat uninspiring. The third choice was a bright, brilliant and bold emerald turquoise. I was immediately taken by it.
20 years of previous experience as a graphic designer has given me a good eye for color and design and I do offer design services for those that request it. In this case, I offered my opinion on which color I would choose and in the end they took my advice, were brave in their choice and wow is it amazing! The whole kitchen just pops and that color brings such great energy and life to that kitchen! They couldn’t be happier with it.
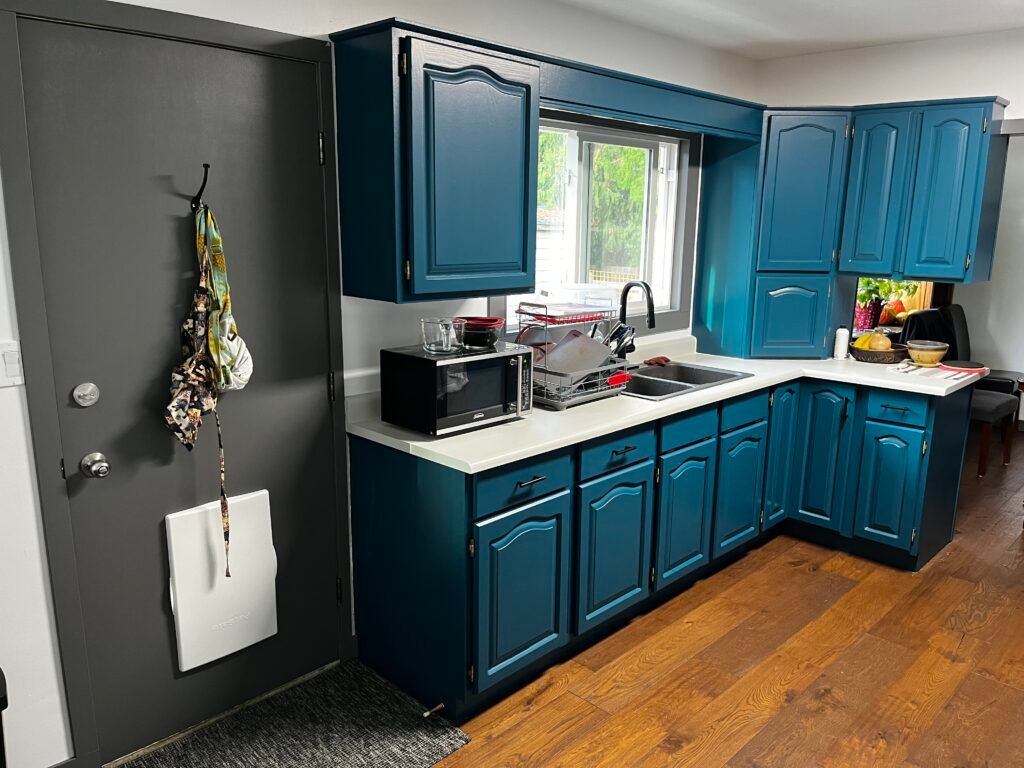
The whole project was a lot of work and it evolved a bit as it progressed but to see how happy my customers were when it all came together was so gratifying. And come together it did! A few outside the box solutions and some brave choices turned an old dated kitchen into something really eye catching and beautiful.
That being said, it was a real pleasure working with you and I hope you enjoy your new kitchen for years to come!
